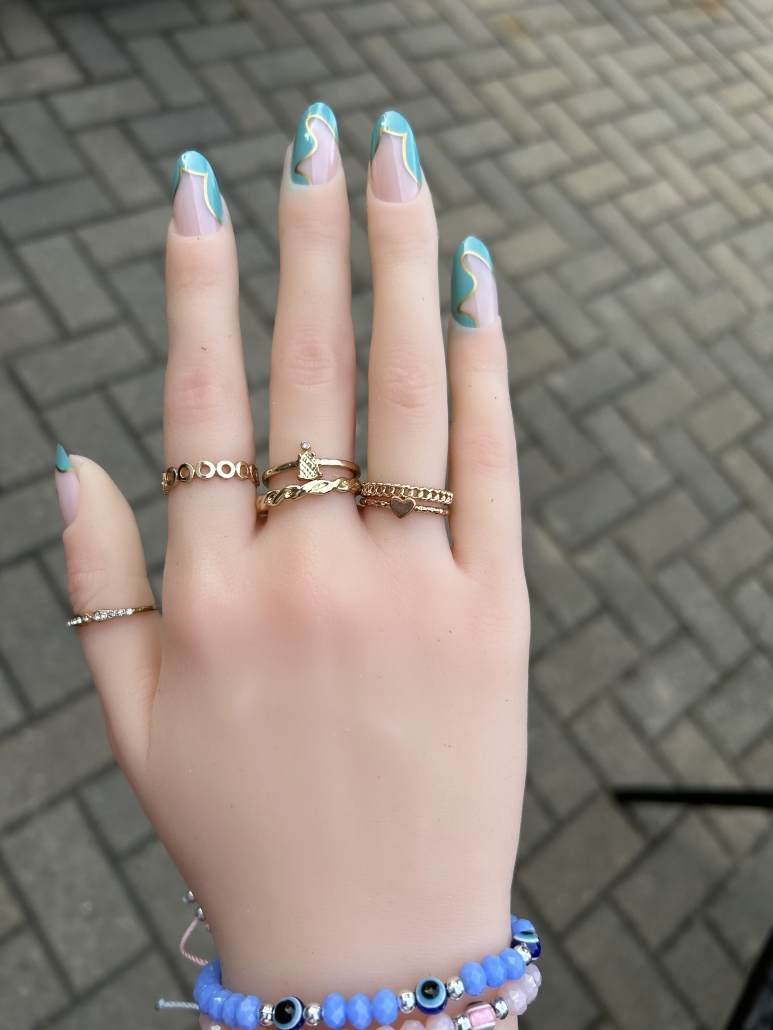
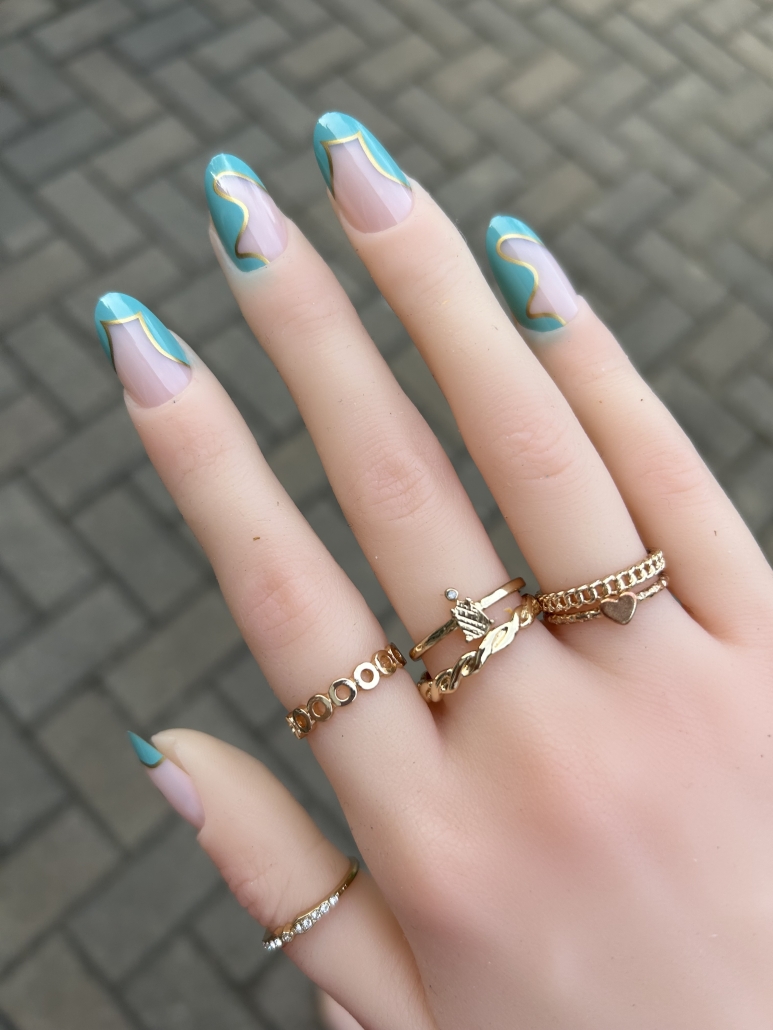
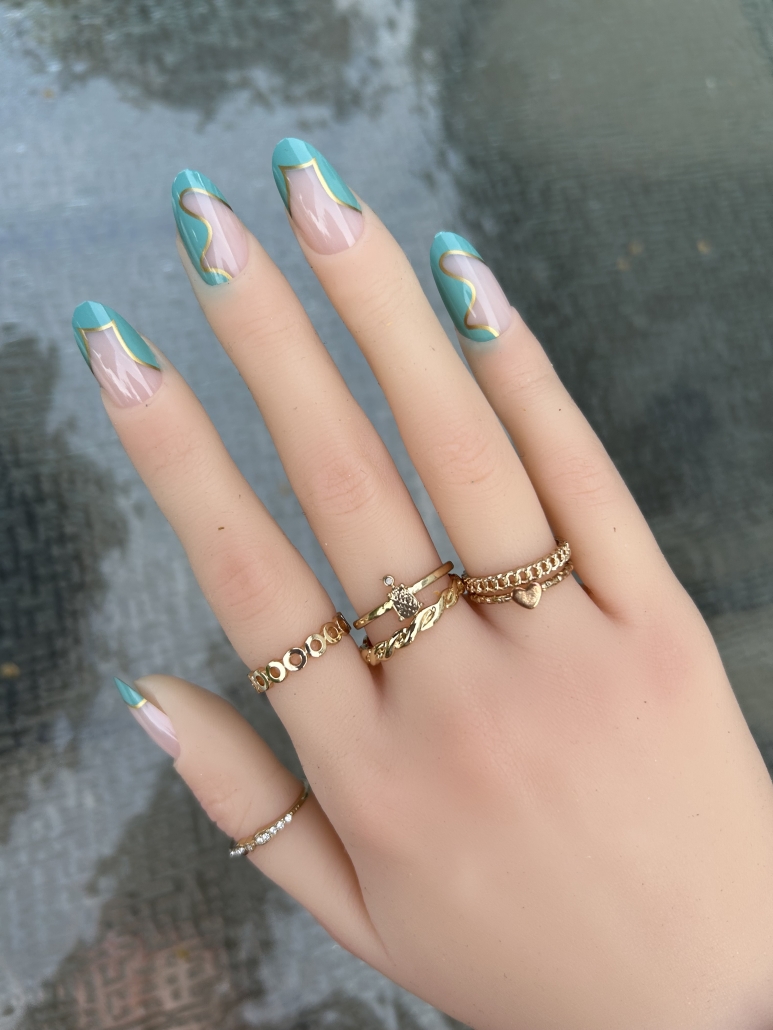
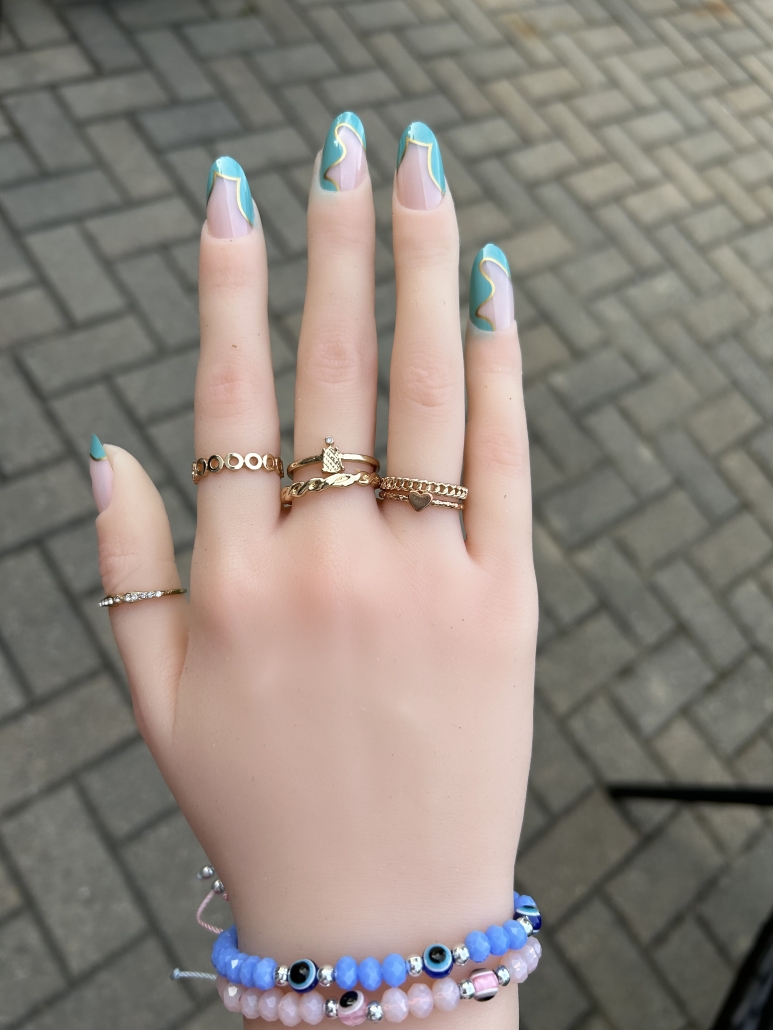
Blue and Gold Nails Design

If you’re looking for a trendy and eye-catching manicure, blue and gold nails are an excellent choice. This striking color combination not only suits various occasions but also adds a touch of elegance and uniqueness to your overall look. In this blog post, we’ll explore the charm of blue and gold nails, how to recreate them, and how you can customize the design to suit your preferences.
The Allure of Blue and Gold Nails
Blue and gold nails exude a vibrant and sophisticated aura that makes them ideal for parties and special events. The combination of these two contrasting shades creates an eye-catching and mesmerizing effect. The richness of the gold beautifully complements the coolness of the blue, making it a perfect match for summer celebrations or a beach photo shoot. These nails are bound to steal the show and garner countless compliments.
Recreating Blue and Gold Nails
To recreate the stunning blue and gold nails, follow these simple steps:
Step 1: Preparing the Nails Start by ensuring your nails are clean, filed, and shaped to your liking. Remove any existing nail polish and gently push back your cuticles. Apply a clear base coat to protect your natural nails and provide a smooth canvas for the nail art.
Step 2: Applying the Blue Squiggly Blob Once the base coat has dried, it’s time to create the unique blue squiggly blob on the right side of the nail. Using a fine-tipped nail art brush or a dotting tool, carefully paint a curvy, wavy line starting from the edge of the nail and moving towards the center. The line should resemble a playful squiggle. Choose a vibrant blue shade that speaks to your personal style.
Step 3: Outlining with Gold Allow the blue squiggly blob to dry completely before moving on to the next step. Now, using a thin brush or a nail art pen, carefully outline the blue squiggle with a luxurious gold polish. The gold outline adds definition and a touch of elegance to the design. Take your time and be patient to ensure precision.
Step 4: Seal the Look Once you’ve outlined the blue squiggly blob with gold, let your nails dry completely. Finish off by applying a high-quality top coat to seal the design and add a glossy finish. This step will not only protect your nail art but also extend its longevity.
Changing Up the Look
While blue and gold make a striking color combination, don’t be afraid to experiment and personalize the design according to your preferences. Here are a few ways to change up the look:
- Color Variations: Instead of blue, you can opt for other bold shades like deep purple, vibrant green, or even a fiery red. Experiment with different colors to suit different occasions or to match your outfit.
- Accent Nails: Consider painting the blue and gold design on just one or two accent nails, while keeping the rest of your nails a solid color. This variation adds a touch of subtlety to the overall manicure.
- Gradient Effect: Create an ombre effect by blending two or more shades of blue, transitioning into the gold outline. This gradient effect adds depth and dimension to your nails.
- Glitter and Embellishments: Elevate the glamour by incorporating glitter or nail art embellishments into your design. Apply gold glitter to the blue squiggle or add rhinestones for an extra dazzle.
Blue and gold nails offer a stunning and versatile manicure option for various occasions, especially parties and summer-themed photo shoots. With a clear base, a vibrant blue squiggly blob, and a delicate gold outline, these nails are both eye-catching and unique. Don’t be afraid to experiment and customize the design by changing up the colors, adding glitter, or incorporating embellishments. Let your nails be the center of attention as you confidently showcase your personal style with this striking and fashionable nail art.

For more looks like this, check out Blue Nail Ideas and Designs.


Leave a Reply
Want to join the discussion?Feel free to contribute!