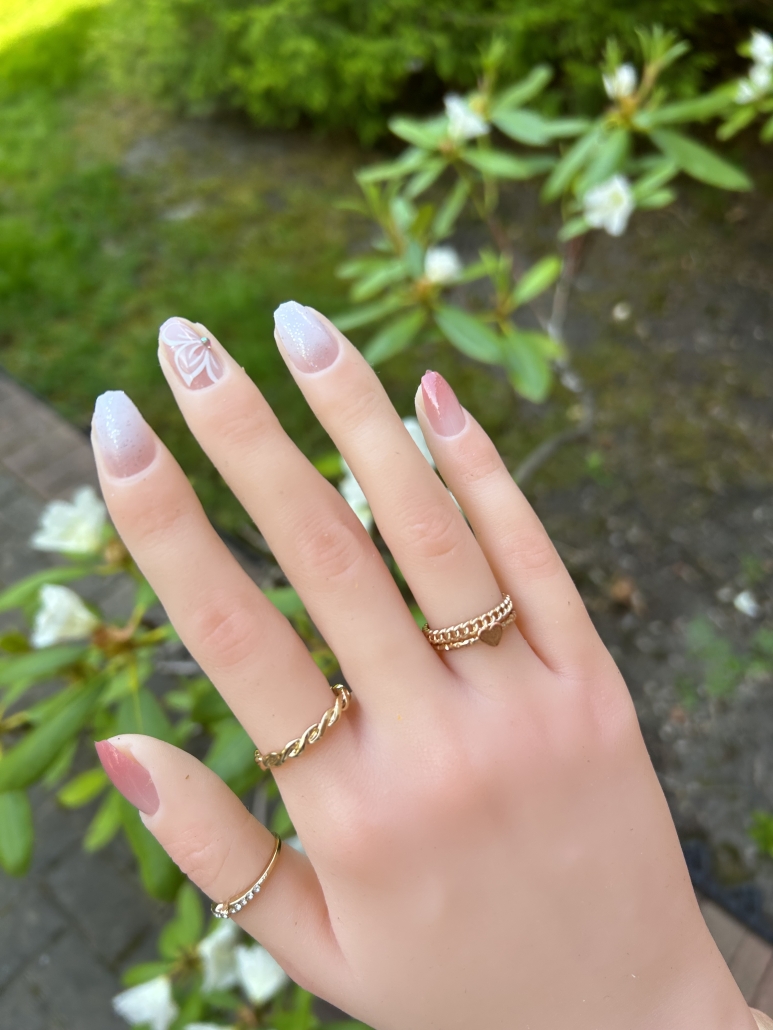
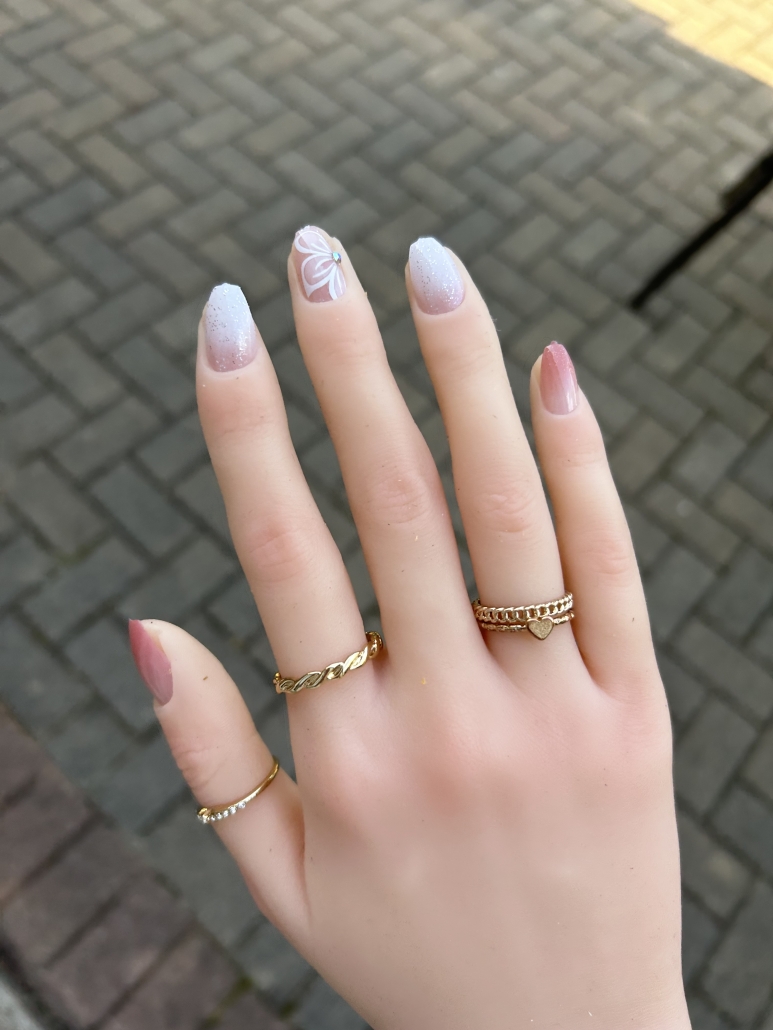
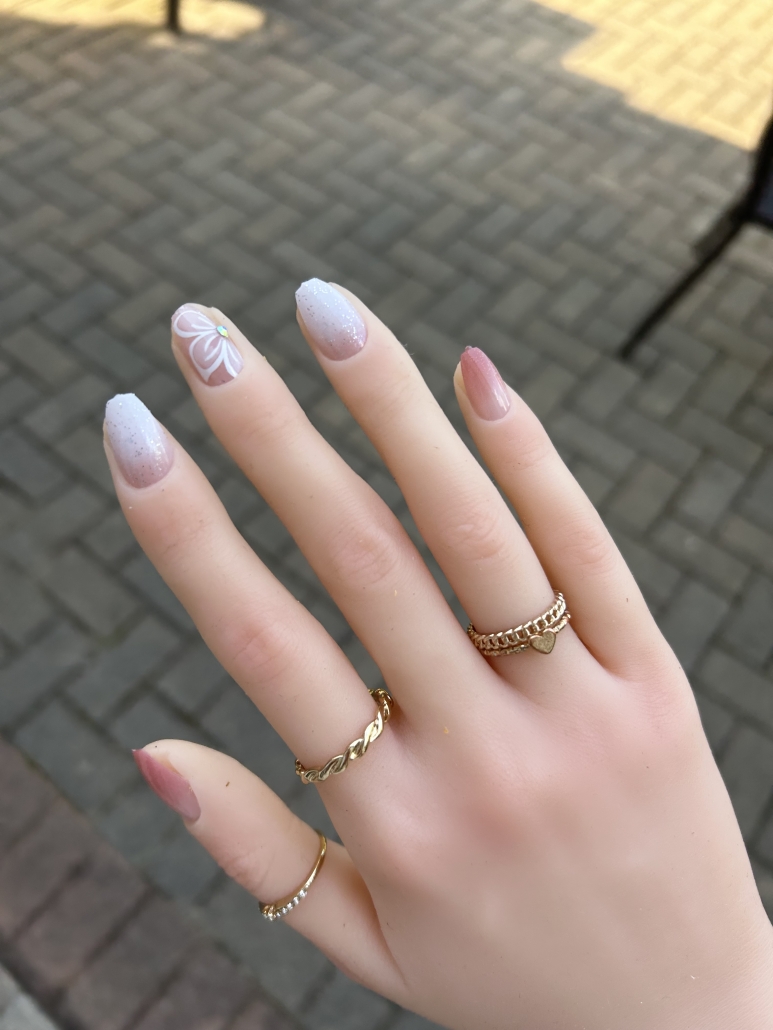
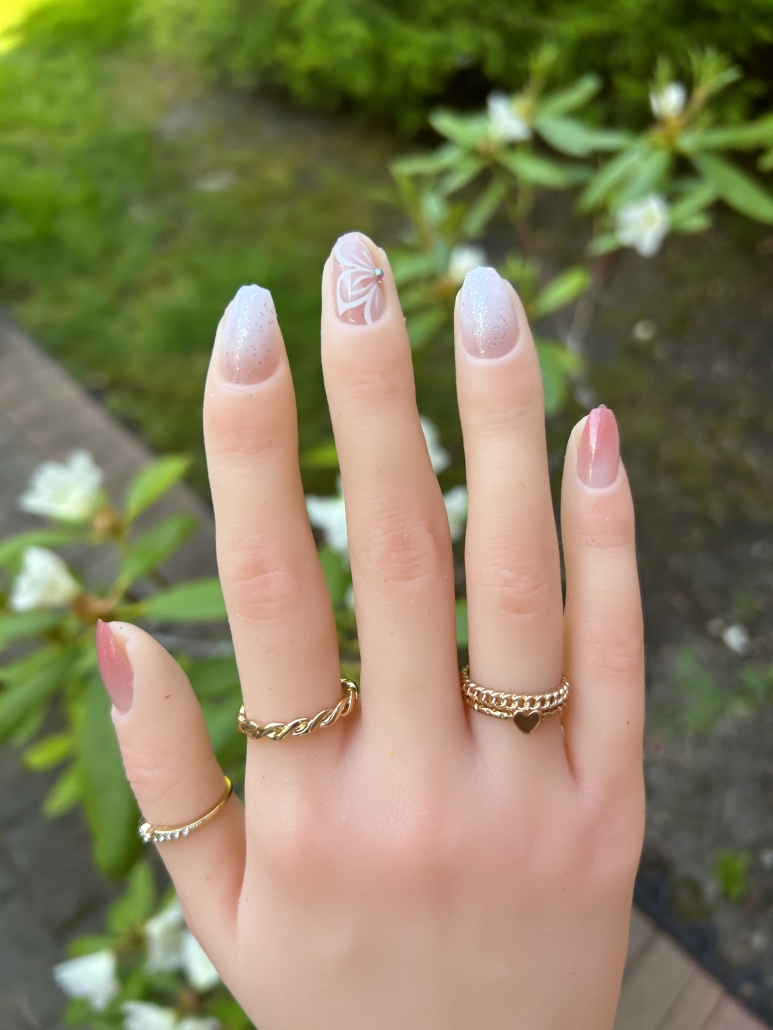
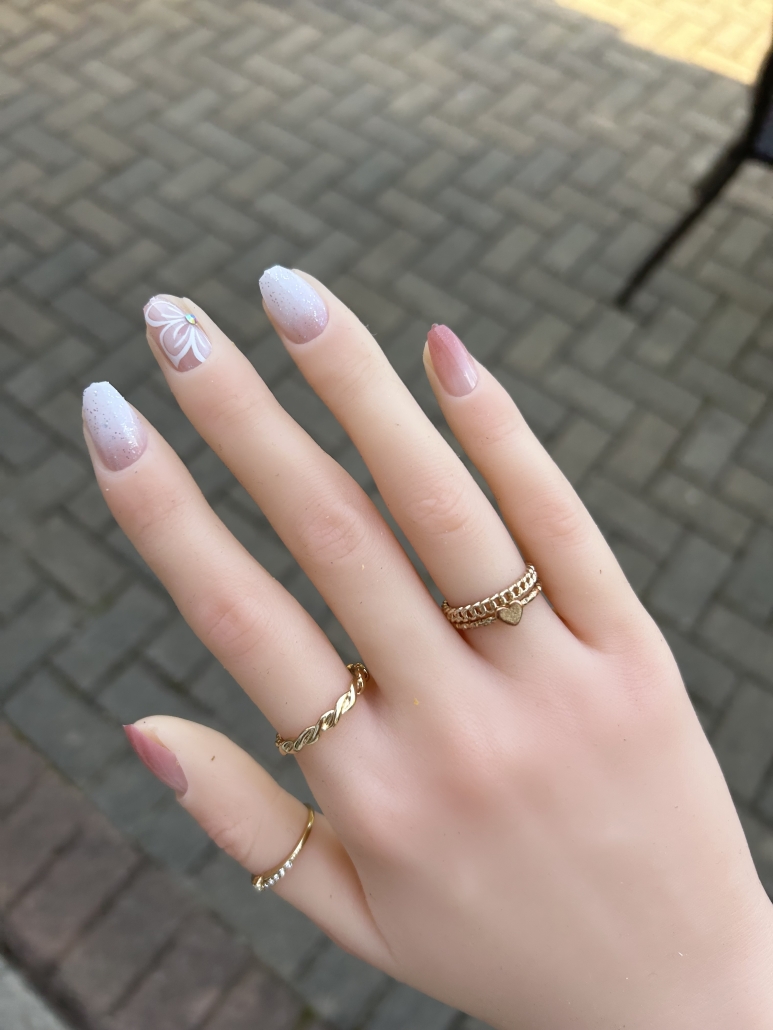
Pink and White Ombre Nails with Flower Design
When it comes to nail art, the combination of pink and white never fails to create a chic and fashionable look. Pink and white ombre nails with a beautiful flower design are currently in vogue, offering a trendy and playful style that is perfect for vacations, parties, or any occasion where you want to make a fashion-forward statement. With the addition of sparkles and a 3D gem center, these nails exude a touch of glamour and whimsy. In this blog post, we’ll delve into the allure of pink and white ombre nails with a flower design, guide you on how to recreate this trendy look, and provide creative ways to change up the design. Get ready to flaunt your fashion-forward nails and embrace the beauty of this eye-catching nail art!
Why Pink and White Ombre Nails with Flower Design? Embracing Trendiness:
Pink and white ombre nails have long been a popular choice for their elegant and feminine appeal. The gradual transition from pink to white creates a soft and romantic effect that complements a variety of outfits and occasions. By adding a flower design, you introduce a tropical and playful element that takes your manicure to the next level. The 3D gem center adds a touch of luxury and sophistication, making these nails a perfect choice for vacations, parties, or anytime you want to make a fashionable statement. With sparkles adding a playful touch, your nails will be the center of attention and elevate your overall style.
Recreating the Look: Step-by-Step Guide:
Step 1: Prepping Your Nails: Start by preparing your nails. Shape them into your desired shape, whether it’s square, round, or almond. Gently push back your cuticles and apply a base coat to protect your natural nails and ensure a smooth application of polish.
Step 2: Ombre Effect: To achieve the pink and white ombre effect, you’ll need a light pink nail polish, a white nail polish, and a cosmetic sponge. Apply a thin layer of the light pink polish to the top half of the sponge and the white polish to the bottom half. Gently press the sponge onto each nail, repeatedly dabbing until the colors blend smoothly from pink to white. Repeat this step for all nails, ensuring that the ombre effect is consistent.
Step 3: Sparkling Touch: For a playful and glamorous touch, apply a layer of sparkles over all the nails. You can use a glitter top coat or individual glitter particles. Allow the sparkles to dry completely before moving on to the next step.
Step 4: Creating the Flower Design: For the middle finger, we’ll create a stunning flower design. Start by applying a pink base on the entire nail. Once dry, use a fine nail art brush or a dotting tool to create a large white flower at the center of the nail. Begin by painting five petals in a circular shape, leaving a small space in the center. To add dimension and depth, carefully layer additional petals on top of the initial ones. Once the flower is complete, carefully place a 3D gem in the center as the flower’s focal point. Allow the design to dry completely.
Step 5: Finishing Touches: To seal and protect your pink and white ombre nails with the flower design, apply a glossy top coat over the entire design. The top coat will not only add shine but also extend the longevity of your manicure. Ensure that the flower and gem are securely sealed. Allow the top coat to dry thoroughly before showcasing your fashionable nails.
Changing Up the Look: Creative Variations:
While the pink and white ombre nails with a flower design are already captivating, you can explore creative variations to customize the look. Here are a few ideas to consider:
- Tropical Leaves: Add a touch of lushness to the design by incorporating tropical leaves. Use a fine nail art brush to paint green leaves along with the flower, creating a tropical paradise on your nails.
- Mix of Gems: Instead of a single gem in the center of the flower, experiment with a combination of gems or rhinestones. Create a sparkling cluster at the center of the flower for a glamorous and opulent look.
- Reverse Ombre: Reverse the ombre effect by starting with a white base and gradually transitioning to pink. This variation offers a fresh take on the design and can create a striking visual impact.
- Play with Patterns: Experiment with different patterns and designs on each nail. Incorporate stripes, polka dots, or other geometric patterns to add visual interest and make each nail unique.
Pink and white ombre nails with a flower design combine trendiness, playfulness, and sophistication in one captivating manicure. The gradual transition from pink to white creates an elegant and feminine ombre effect, while the tropical flower design and 3D gem center add a touch of whimsy and luxury. The sparkles contribute a playful and glamorous touch, making these nails perfect for vacations, parties, or any occasion where you want to make a fashion-forward statement. By following our step-by-step guide, you can recreate this trendy nail look and enjoy the compliments that come with it. Additionally, don’t hesitate to explore creative variations such as incorporating tropical leaves, experimenting with different gems or rhinestones, trying a reverse ombre effect, or playing with patterns to customize the design and make it uniquely yours. So, embrace the allure of pink and white ombre nails with a flower design, let your nails be a canvas of fashion and creativity, and enjoy the beauty of this eye-catching nail art! If you liked this ombre look, check out Pink And Orange Ombre Nails Design Ideas – Sunset Nails and Blue And Beige Ombre Nails With Solid Blue Accent Finger. For more white nails, be sure to check out White Nail Ideas and Designs. For more pink nails, check out Pink Acrylic Nail Ideas.


Leave a Reply
Want to join the discussion?Feel free to contribute!