How to paint a flower onto nail
I know what you might be thinking – painting a flower onto your nail can be pretty hard. In this guide, I will break down how to paint a flower onto your nail pretty simply! Whether you’re a seasoned nail artist or a newbie looking to try something new, flower nails are an adorable and trendy choice for the sunny seasons. So, grab your favorite nail polish shades and let’s paint some flowers onto your nails!
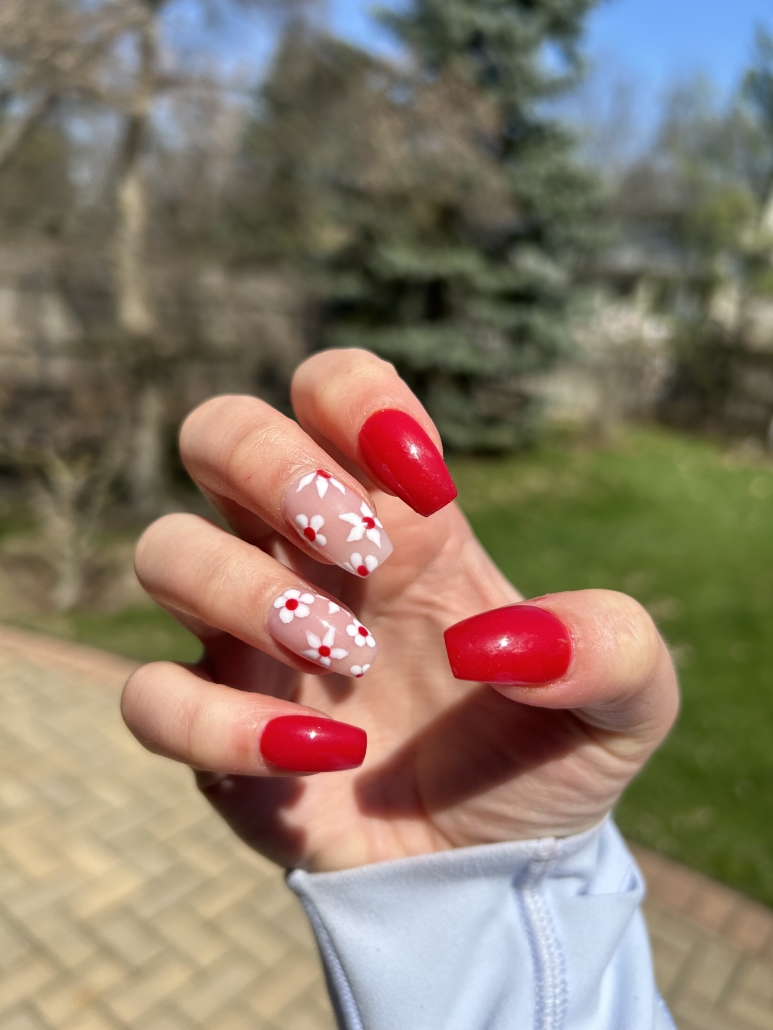
How to paint a flower onto a nail:
- Gather Your Supplies: Before we begin, make sure you have all the essentials at hand. Here’s a list of what you’ll need:
- A base coat
- Various nail polish colors (think vibrant and pastel shades for that spring/summer vibe)
- A fine-tipped nail art brush or a toothpick
- A dotting tool (optional)
- Nail polish remover with a q-tip (for any accidental smudges)
- A top coat to seal and protect your masterpiece
- Prep and Prime: Start by prepping your nails. Remove any old polish and file them into your desired shape. Apply a thin layer of base coat to protect your nails and ensure a longer-lasting manicure. Once the base coat is dry, it’s time to unleash your creative side!
- Pick Your Flower Power: Now comes the fun part – choosing the flowers you want to paint on your nails! From daisies to roses and everything in between, the possibilities are endless. You can opt for a single flower on each nail or create a bouquet with multiple blossoms. Don’t be afraid to mix and match colors to achieve a vibrant and eye-catching look.
- Start with the Basics: For beginners, it’s best to start with simple flower designs. Dip your fine-tipped brush into your desired color and create a small dot at the center of your nail. This dot will serve as the focal point of your flower. Next, carefully draw a few thin lines extending from the dot, resembling petals. Remember, it doesn’t have to be perfect! Imperfections only add to the charm of hand-painted nail art.
- Add Some Detail: Once you’ve mastered the basics, let your creativity flourish by adding details to your flowers. Use different colors to create shading, highlights, or intricate patterns on the petals. You can even experiment with using a dotting tool to add additional texture and dimension to your design. Don’t forget to let each layer of polish dry before moving on to the next step to avoid smudging.
- Seal the Deal: Once you’re satisfied with your floral masterpiece, give it some extra protection and shine by applying a top coat. This will help your design last longer and prevent chipping. Allow your nails to dry completely before going about your day, as the top coat takes a bit longer to set.
Congratulations, you’ve successfully painted a beautiful garden of flowers onto your nails! Flower nails are a fantastic way to embrace the lively spirit of spring and summer while adding a touch of cuteness to your overall look. Remember, practice makes perfect, so don’t be discouraged if your first attempt isn’t flawless. Keep experimenting, and soon you’ll be a nail art pro. So go ahead, show off your blooming nails, and let your fingertips become a miniature garden wherever you go!
Want some inspiration for some flower nails? Check out Flower Nails – Designs and Ideas for some adorable flower nails.


Leave a Reply
Want to join the discussion?Feel free to contribute!