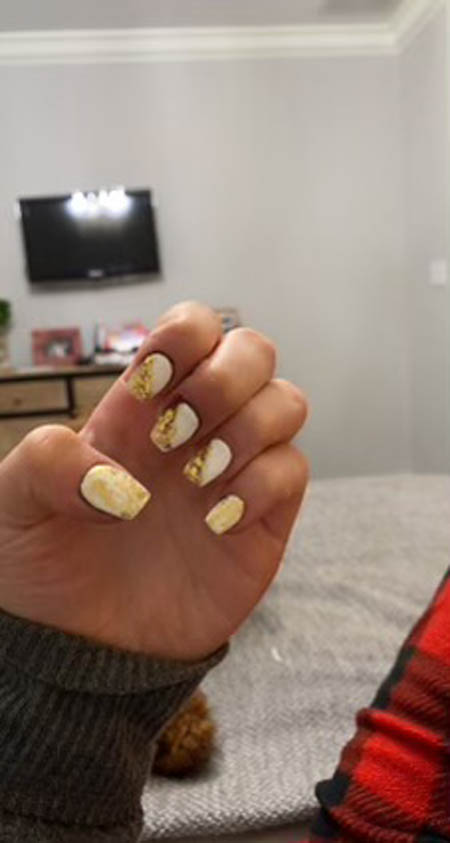
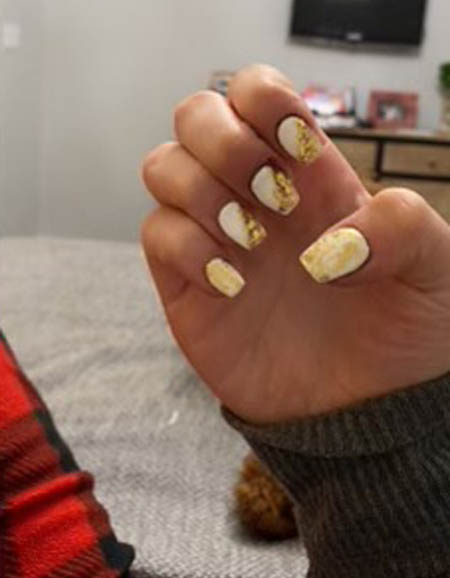
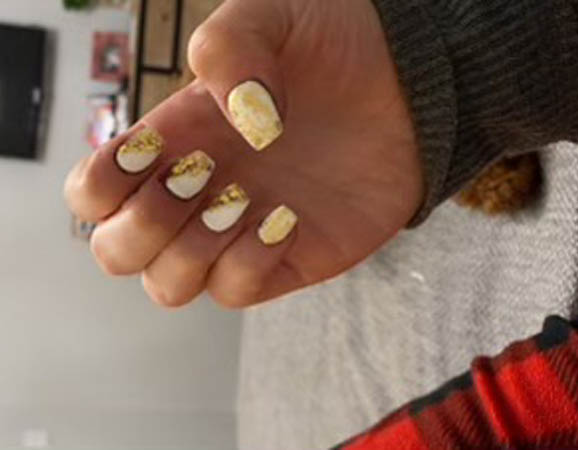
White And Gold Glitter Nails Colorblock Design Idea
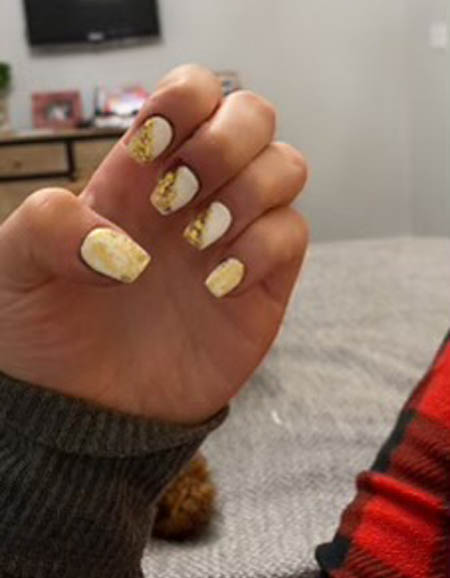
White and gold are a classic combination for an elevated chic look. The gold glitter design of this DIY manicure is perfect for a party or the holiday season. It’s super versatile for any season; I can see it working beautifully for a summer wedding guest or on a winter snow day insta photoshoot.
PS If you’re looking for winter nail design inspiration, don’t miss the Winter Snowflake Blue French Tips Design and the super cute Glitter & Candy Cane Design!
How to do White And Gold Glitter Nails Color block Design: Shaping The Nails
Shaping the nails is always the first step; I chose a medium square shape for this nail design. The goal for square-shaped nails is a straight tip with gently smoothed edges. If you want more of a squoval shape, simply round the edges more. For more details on shaping square nails, check out White Nails with Gold Foil Accent.
How to do White And Gold Glitter Nails Color block Design: Painting The Nails
To expertly DIY this nail design, you’ll need:
A true white nail polish of your choice
Gold glitter polish that is heavy on the glitter
Clear topcoat
Washi or masking tape
First, paint two thin coats of white polish on all nails. Painting two thin coats will create an opaque white while drying fast.
Next on the thumb and pinky only, paint one thin coat of gold glitter polish. Try to keep the glitter uniform on the whole nail while allowing the white polish to show through.
Allow the polish to completely dry so you don’t smudge them on the next step.
I like to do this step one hand at a time. To create the color block nail design, place a strip of the washi tape at an angle on each of your remaining nails. You can do any angle, but keep all the washi tape strips at the same angle for a cohesive look.
Gently pat down the tape to prevent any polish transfer. Then take the gold glitter polish and paint the remaining part of the nails. Start at the taped-off part and paint your nail as you would normally. Do one or two coats, depending on how glittered of a look you like.
Before the nail polish has time to dry, quickly and carefully remove the washi tape. If needed you can take a tiny makeup brush and touch up any smudges or stray glitter pieces. Allow the gold glitter polish to dry completely. Then, paint one top coat over all nails to protect the design.
White And Gold Glitter Nails Color block Design Ideas for Styling
The Clean Girl look is so in right now! While it favors simple and neutral designs, this white and gold glitter nail design can work for a clean girl aesthetic. Simply pair it with neutral or muted colors and natural materials.
If you are more of a bolder-is-better aesthetic, pair this easy nail design with jewel tones and gold accessories. This nail design can work with most fashion looks; it’s versatile and fun while still classy and chic.
If you love white nail designs, you’ll love White Nails with Gold Accents. And the White Nails with Butterfly Design is perfect for a spring look!


Leave a Reply
Want to join the discussion?Feel free to contribute!